Notifications

The notification system is divided in two parts. There is a notification system service which can be email, push over, or http API calls. And there are notification actions. Like sensor alarms, door openings.
Rate limits
Both the service as the message has a rate limit setting which controls the amount of message per minute are send. If you set a rate limit in the service setting, than that rate limit will count for all messages send through that service.
For a single message you can rate limit it for only that message. So an update message can be rate limited to 3 a minute while other messages are not rate limited.
Use the value 0 for unlimited amount of message, no rate limit.
Services
There are multiple services available which can be used multiple times. So you can have configured three email addresses to send messages to. But you can also add email and push over and sent alarms through push over and other through email.
Rate limiting is explained here.
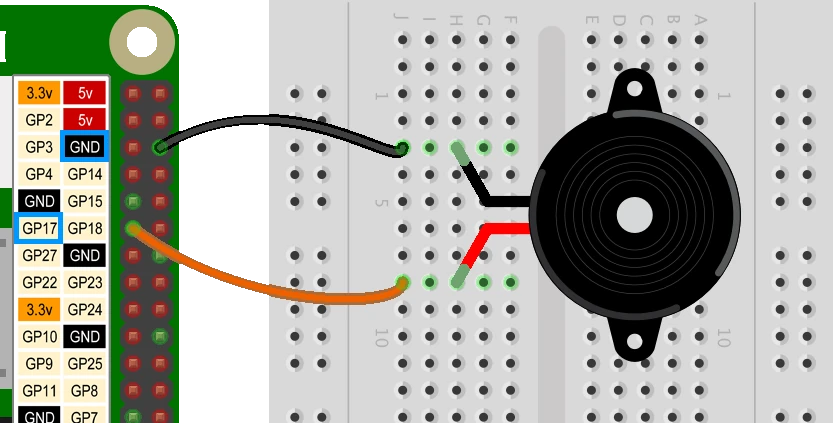
Buzzer
 With the buzzer you can play some songs when there is a warning. You can only play the songs that are shown in the list. Make sure you copy and past the song name and put it in the subject of the message.
Connect the buzzer to a GPIO pin and enter the physical pin number as address.
Display
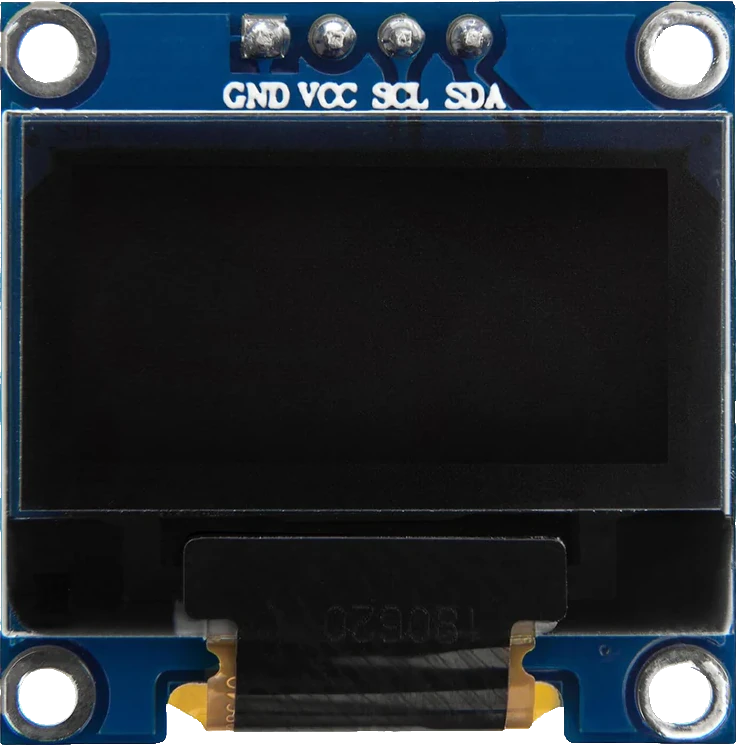
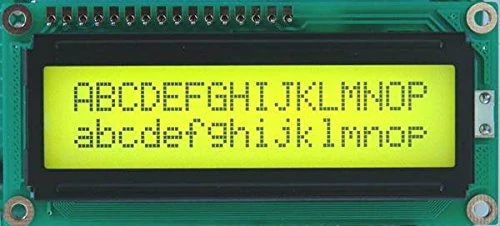 We support multiple types of displays. There are 2 and 4 lines LCD displays as small OLED displays. When a display is used, it will show a summery after every update run.
For address enter the I2C address.
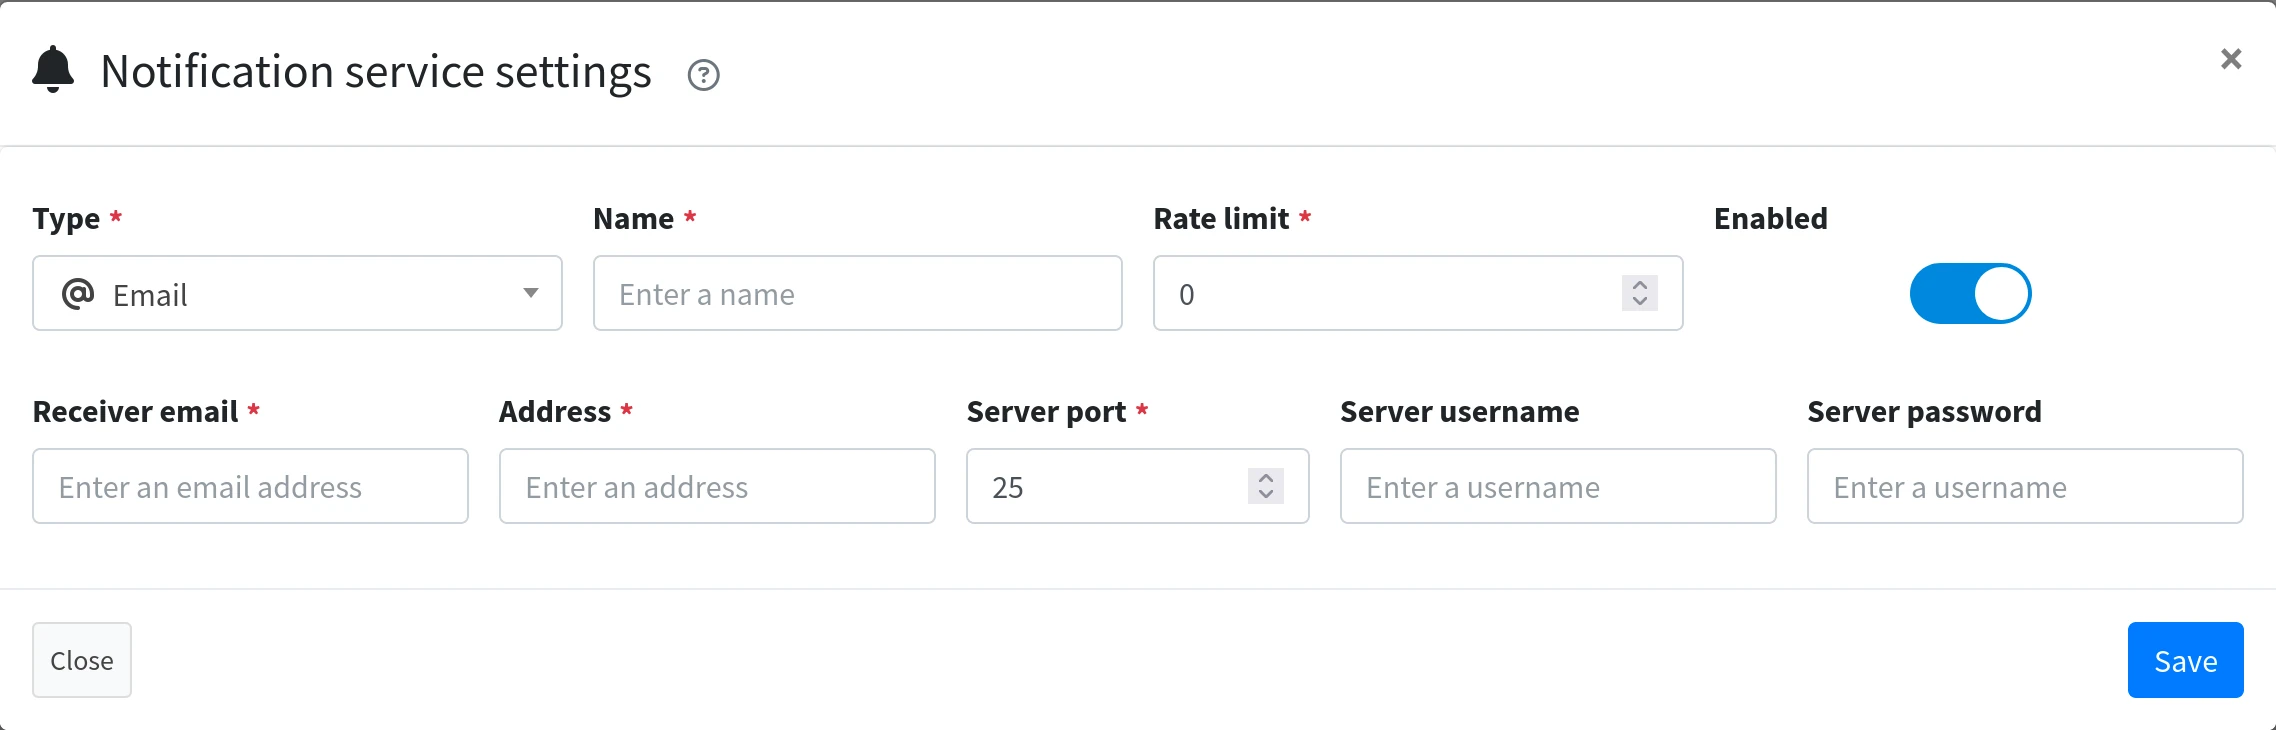
 Here you can setup the receiving email address and the account details for sending the email. It needs the server address and port together with a username and password to be able to send out emails. It will auto detect TLS/SSL connection options to use.
The receiver email address does not has to be te same as the used account for sending emails.
Mastodon
 It is possible to send messages through Mastodon. In order to connect to Mastodon you need to create an
 application in the development section at your or special bot account. There you create an app with the following rights:
- read:statuses
- write:media
- write:statuses
After saving you will get all the needed keys and secrets to make the connection.
Private notifications
It is possible to send out private notifications. To enable this specify a list of Mastodon accounts that should receive the notification. When left empty, the notification messages will be public!
MQTT
 You can use a MQTT service to send messages and act on based on the content or topic with other clients. It will auto detect TLS/SSL connection options to use. Enter the server address, port number, username and password in the form to connect to a MQTT server. It will connect with a client id:
 TerrariumPI {version}. It will start the full topic location with terrariumpi. From there you will get sub topics based on the message type. If there is an ID in the data (from a sensor), than this ID will also used as a subtopic. This way you can subscribe to sensor warnings for a single sensor.
Subscribe, for example, for a topic: terrariumpi/sensor/warning/1234567/ to get only sensor warnings for sensor id 1234567. You can use wildcards * in the topic path.
The contents is in JSON and contains all the data that is available as a place holder and some extra fields:
1
2
3
4
5
6

{
  "uuid": "",
  "topic": "",
  "subject": "",
  "message": ""
}
And expect all the place holder fields that are available for the specific message type. The field uuid contains a unique ID so you can track if the message has been processed by logging this ID somewhere. It will not send files, as that will make the messages to big.
Pushover
![]() For push over you need to enter the API token and user key in order to make a connection. These can be found/created in your account at Pushover. You can then receive messages with the subject and message you entered in a notification message. When you selected the
For push over you need to enter the API token and user key in order to make a connection. These can be found/created in your account at Pushover. You can then receive messages with the subject and message you entered in a notification message. When you selected the system_error message type, you should get a siren sound when you receive a system error message for extra attention.
Telegram
![]() For Telegram you need to enter the Bot token and username in order to make a connection. A Telegram Bot can be created here.
For Telegram you need to enter the Bot token and username in order to make a connection. A Telegram Bot can be created here.
Enter your username(s) without the @ sign and separate them with a space. Only entered usernames can receive messages and send commands. The bot token is stored encrypted in the database.
In order to receive messages, you need to start talking to your Telegram bot through your telegram app. This is done by sending a telegram command /start. You should get a response like start command received, you are now getting updates....
Commands
With the command /help you get some more options you can do with the Telegram service. Those are for now:
1
2
3
4
5
6
7
8
9
10
11
12
13
14

/start
: This will start listening for notifications.
/webcam [webcam_id]
: will show the latest image of the webcam ID.
/sensor [sensor_id]
: will show the current sensor state. Sensor id is optional.
/relay [relay_id]
: will show the current relay state. Relay id is optional.
/button [button_id]
: will show the current button state. button id is optional.
/enclosure [enclosure_id]
: will show the current area state of the enclosure ID
/status
: will show the current system status.
Traffic light
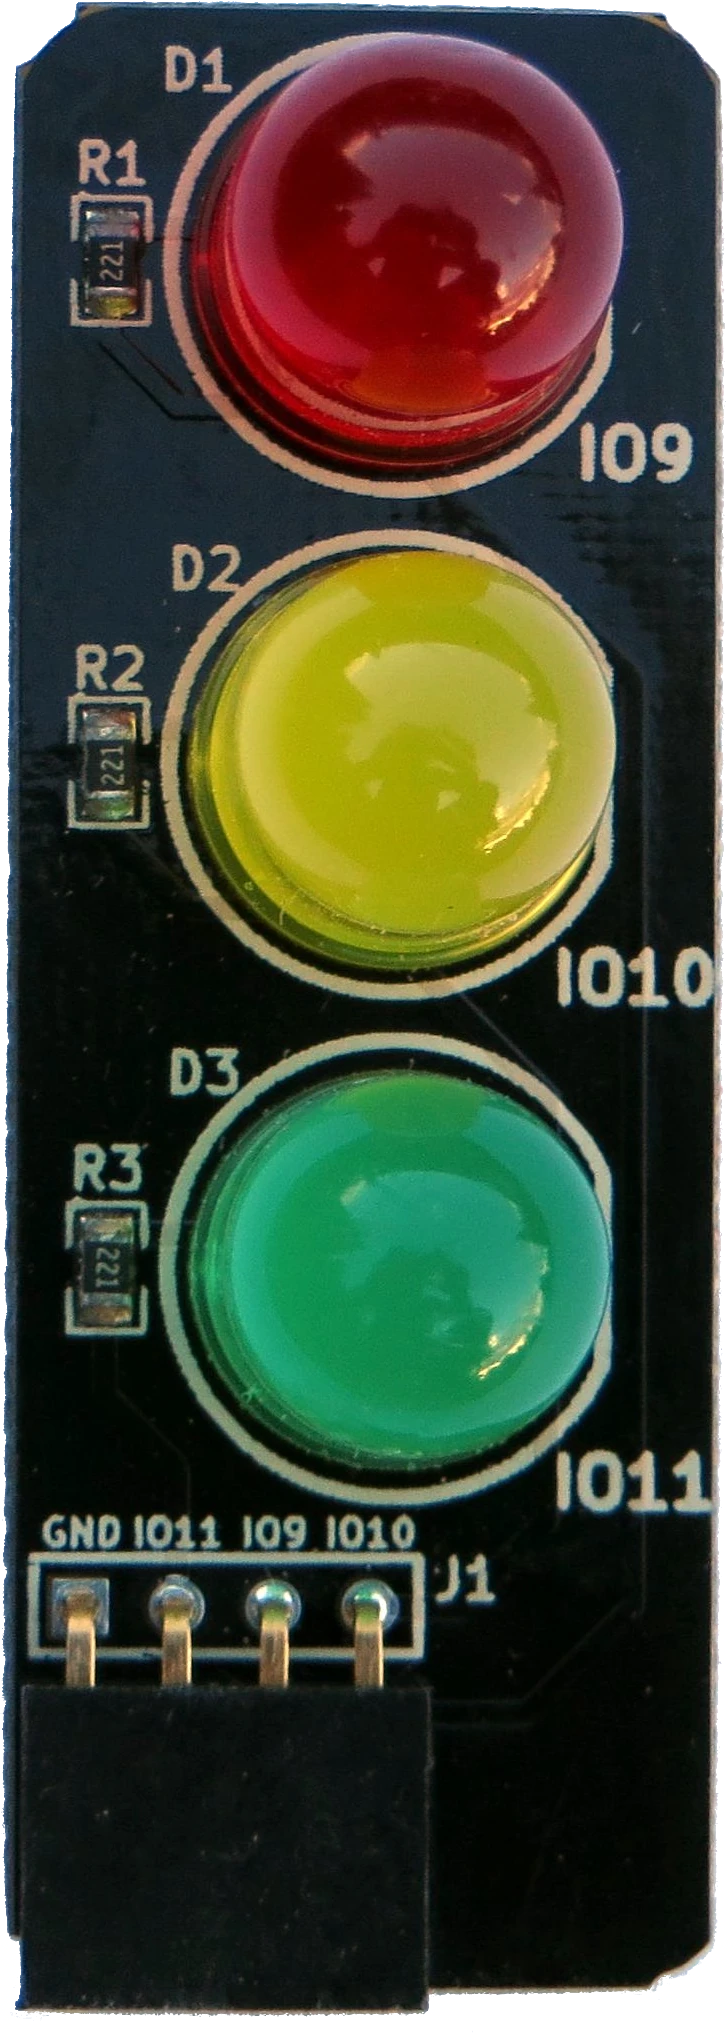
 The traffic light works a bit different. It will only work on system warnings and errors. So if you select this for a different message type, it will not react.
It uses three GPIO address for the different colors/lights.
When there is a system warning, the amber light will be lit for 5 minutes. When there is an error, the red light will be turned on for 15 minutes. If there is no warning or error message after the timeout, the lights will go off and only the green light will be on.
Web-hook
Enter a full url where the data is posted to. The data is in JSON format. The will contain the following data:
1
2
3
4
5
6
7
8
9
10
11
12

{
  "message": "",
  "subject": "",
  "uuid": "",
  "type": "",
  "files": [
    {
      "name": "",
      "data": ""
    }
  ]
}
The files are optional. So check if it is in the JSON data. The data of the file is in base64. This can be used to send webcam images.
The field uuid contains a unique ID so you can track if the message has been processed by logging this ID somewhere.
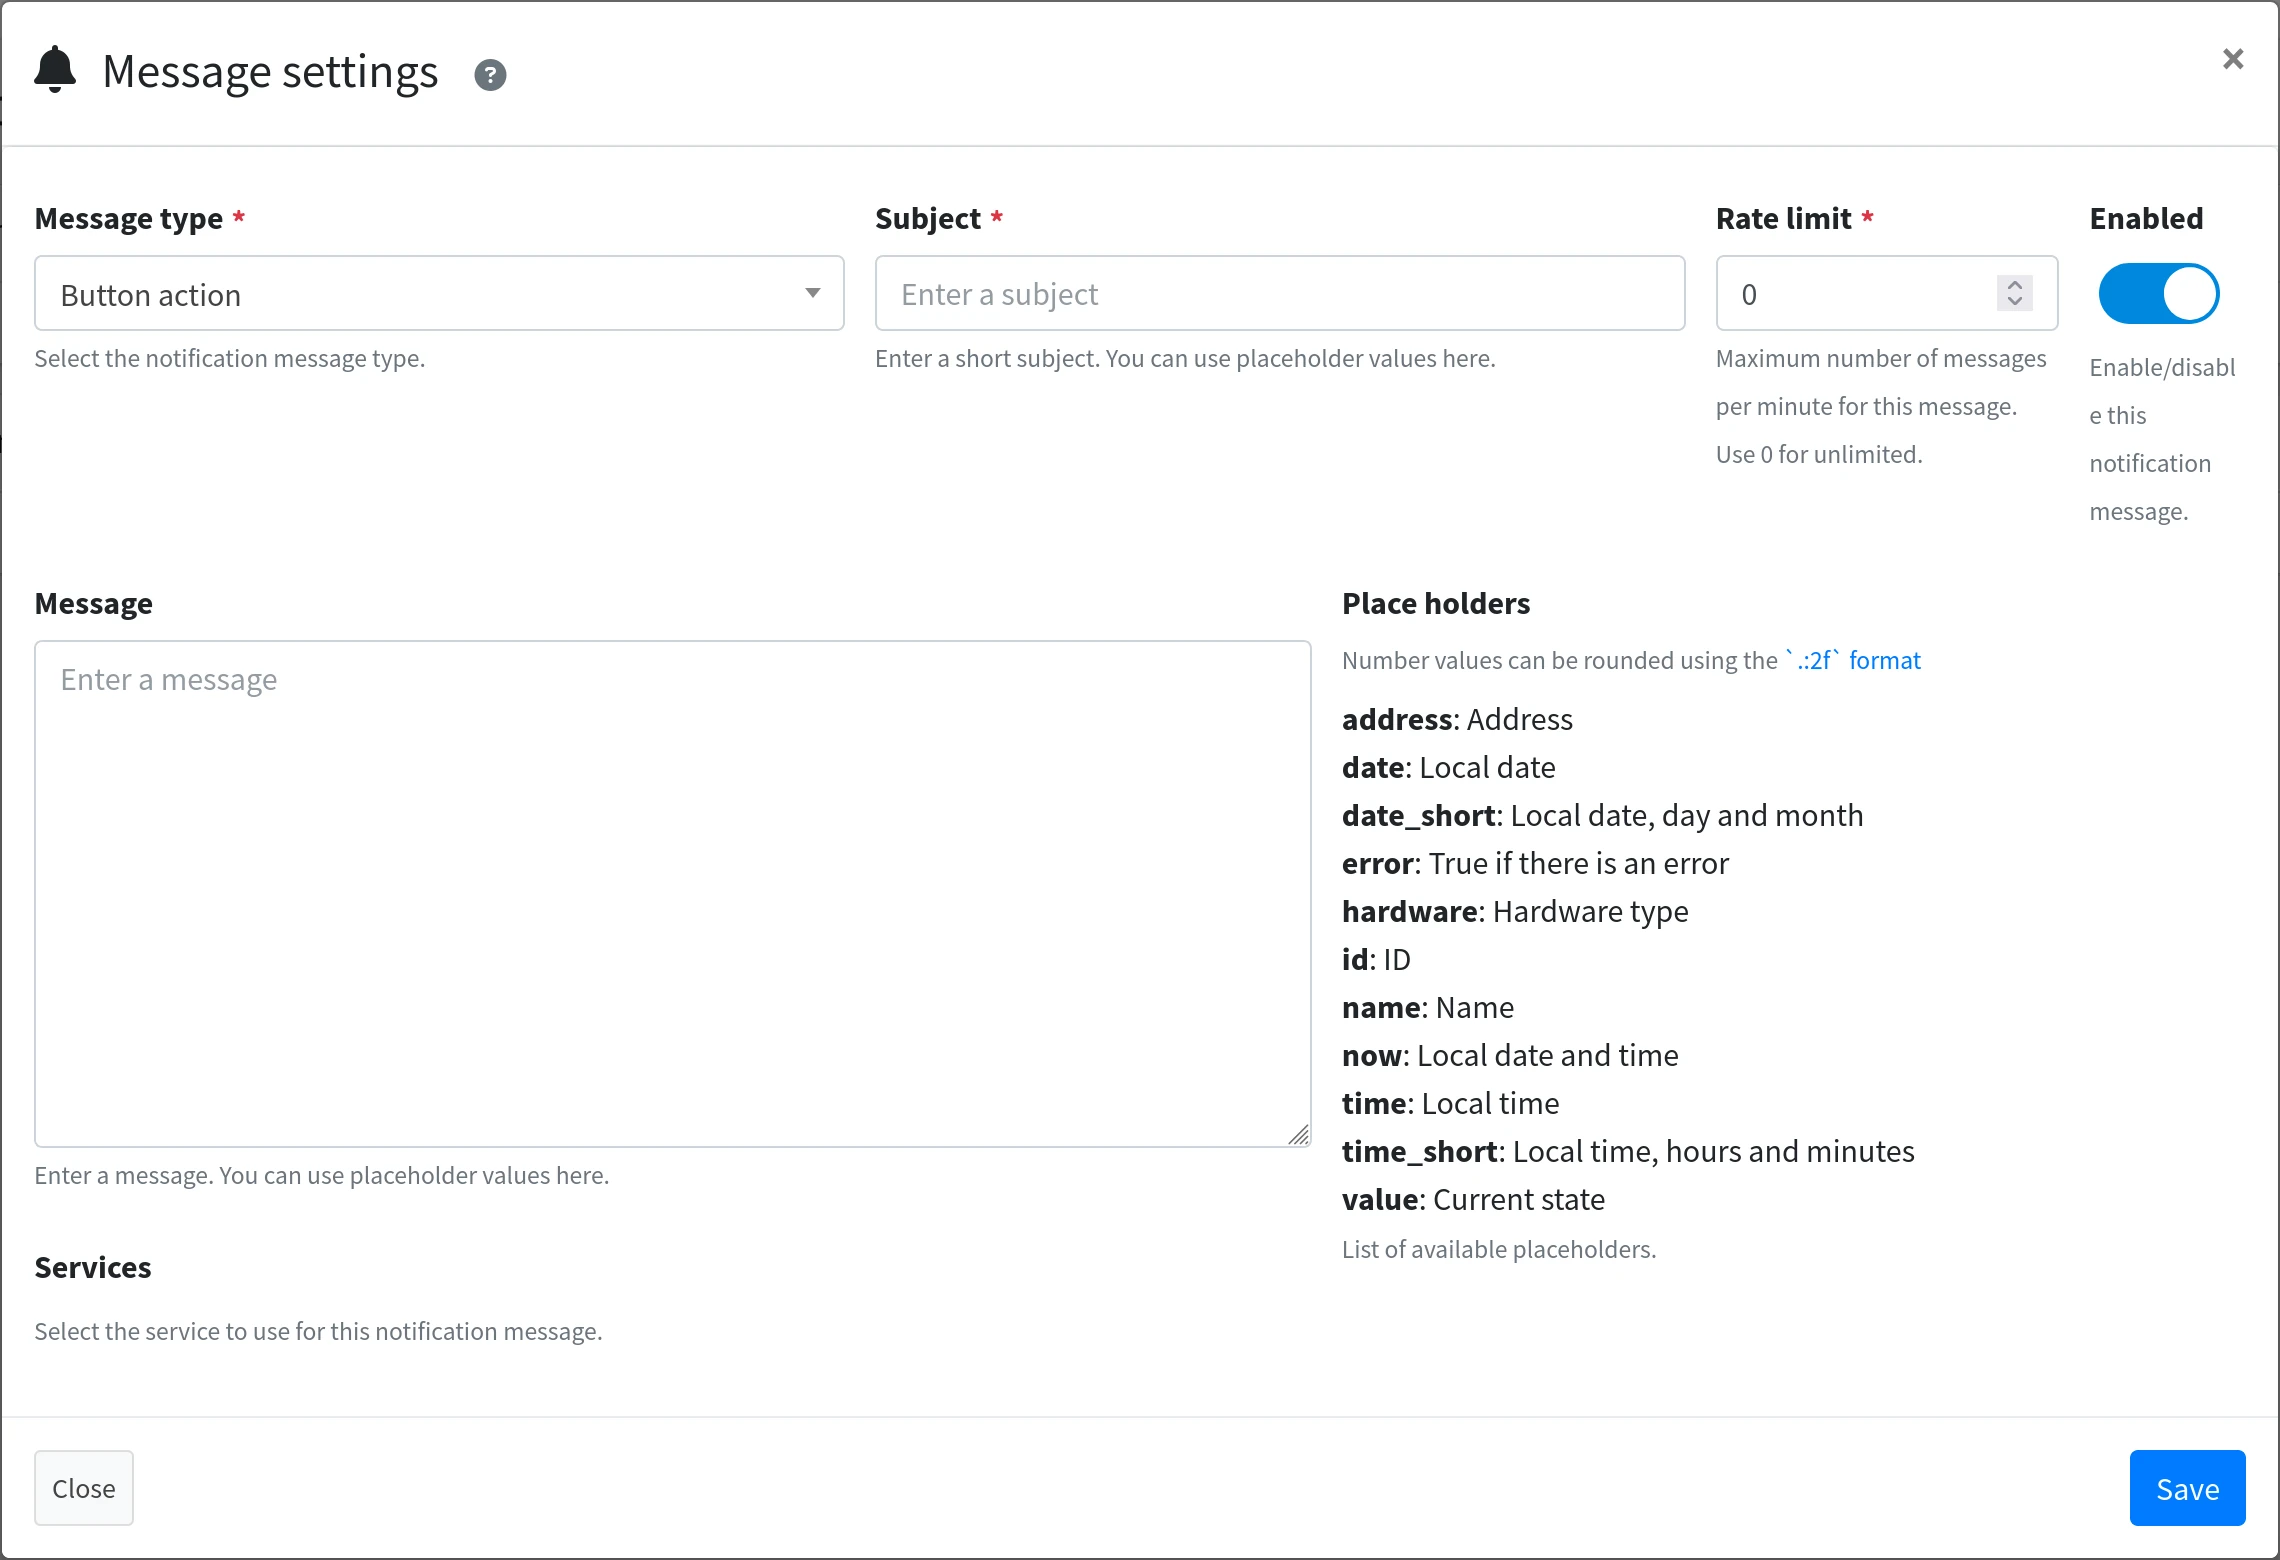
Messages
There are several messages types you can use. Select one from the message type options. When selecting for example for sensor changes, you will get a message for each sensor that is changing. At this point it is not possible to have a single message for a single sensor or relay.
Rate limiting is explained here.
Place holders
In the subject and message field you can use place holders for actual data in the messages. Use the format ${name} will use the name of the sensor or relay in the message. Where name is the place holder name that is available in the list of place holders on the right side of the form. Use ${now} for the current date and time when the message is created.
For example based on the screen shot above. We can create a subject with the value Button ${name} is pressed. And for the message you can enter something like:
1
2
3
4
5
6

The button ${name}(${id}) is pressed on ${now}

The current state is ${value}

Kind regards
TerrariumPI
You can also use ${now:%d-%m-%Y %H:%M} for a custom date format.
For number formatting you can use the following place holder code: ${value:.2f} will show the current number value with 2 decimals accuracy.
More information about (python) text formatting can be found here.
Destination services
All the services you have setup will show up as an icon which you can click on to enable or disable to send the message through that service. So make sure you have setup your services first.